
 Use Voting Buttons in Outlook
You can easily create an email poll using Voting Buttons in Outlook. When creating the message, you can use the default Outlook voting responses, or customize your own. After receiving responses, Outlook will automatically keep track of the responses and you can also copy the results into a blank Word document, or copy them into Excel.
Please note, a Microsoft Exchange Server account is required to use the feature. Student SU Mail accounts do not use an Exchange Server. How do I tell if I have an Exchange account in Outlook.
Add voting buttons
- Create an email message or reply to or forward a message that you received.
- On the Options tab, in the Tracking group, click Use Voting Buttons.

- Choose one of the following:
- Approve;Reject
- Yes;No
- Yes;No;Maybe
- Custom – use this option to create your own custom voting button names.
Do the following:- In the Properties dialog box, under Voting and Tracking options, select the Use voting buttons check box.
- Use the default button options, or delete the default options and then type the text that you want, and use semicolons to separate the button names.
- Click Close.

- Type your message and Send it.
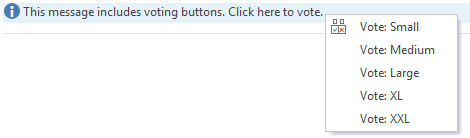
- Recipients can vote in the Reading Pane or in an open message. In the Reading Pane, click the Click here to vote line in the message header and then click the option that you want. Outlook displays how you voted – click OK to send the response, or choose to edit your response before sending.
- In an open message, on the Message tab, in the Respond group, click Vote, and then click the option you want. Send or Edit your response, when prompted.
Review the voting responses
- The sender can see all responses in a table. On one of the response messages, click the The sender responded line in the message header, then click View voting responses.
- The Sender can also see all responses in a table by opening the voting poll email in the Sent folder and clicking the Tracking button found under the Message tab in the Show group.Tip: The Tracking button doesn’t appear until at least one vote has been cast.
When you create and send an email poll to others, you may want to track and print the results. You can either quickly copy the voting results into a blank Word document or a new email, or copy them into Excel so you can work with the data later.
This Help topic came from Microsoft Support and applies to: Outlook 2016, 2013, 2010 and 2007.